This is the third in a series of posts that will walk you through using the Openstack-based OVH public cloud. In this post you will get introduced to using rclone to upload and retrieve files from the Openstack swift API.
This post is assumes you have already signed up for an account with ovhcloud.com, added a payment method, created a cloud project and created an Openstack user. If you have not done these steps you can follow the steps in the first and second blog post in this series that will walk you through completing those steps.
I will attempt in this post to present the options that are available to OVH public cloud customers along side the choices I made that were specific to my Openstack server.
Let’s get started…
1. Sign into ovhcloud.com.
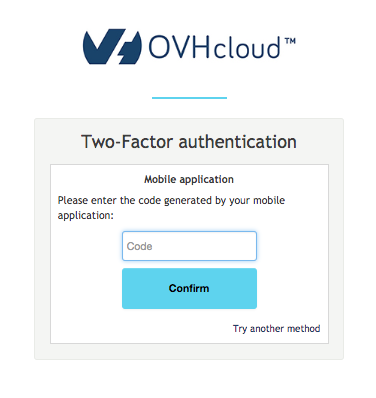
The first thing you will need to do before you can move forward with this post is sign into https://ovhcloud.com/auth/ using the account you created in the first blog post..

If you setup two-factor authentication, you will be prompted to enter the current two-factor token.
2. Create a object container.
The first step to store files in your OVH Public Cloud will be to create a swift object container to store the files. Object containers are managed by clicking the storage tab of the cloud project you want to store files in.
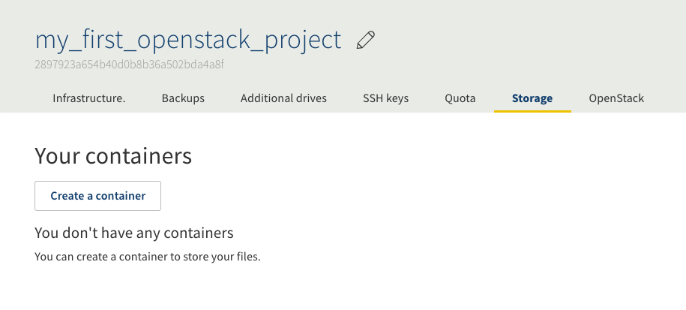
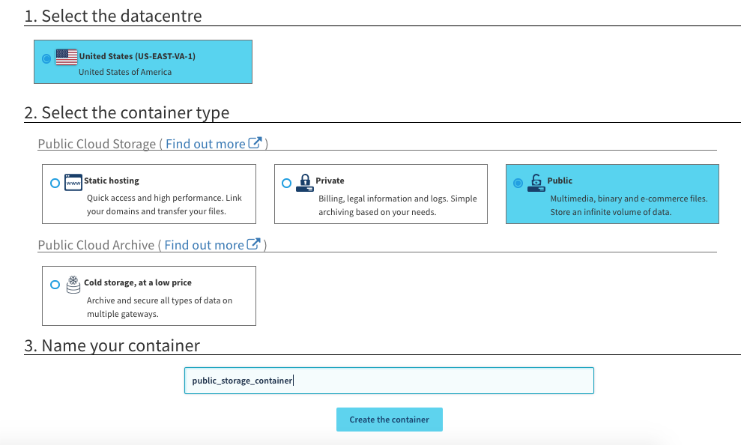
If you do not have any object containers create, you can create one by clicking the Create a container button.
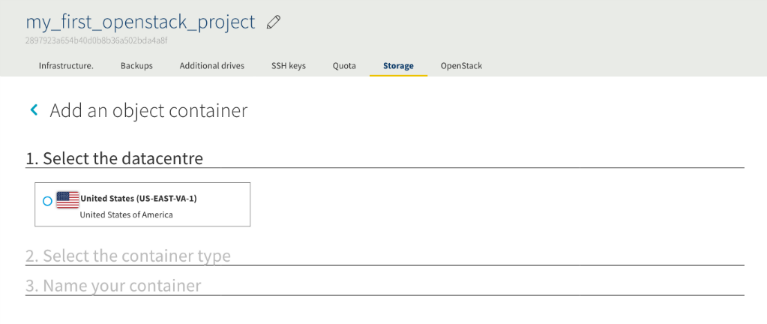
Select the datacenter you want to create the object container in.
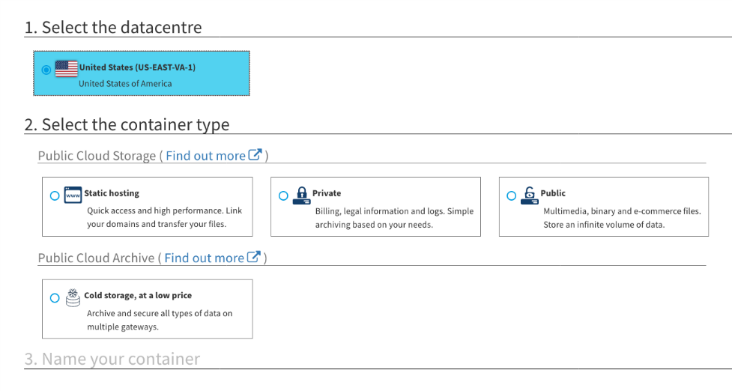
Select what purpose for which you are intending to use the object container storage. I am intending to test file that need to be publicly available, without any sort of authentication, so I chose Public.
Name the object container a name that reflects it’s purpose and click Create the container
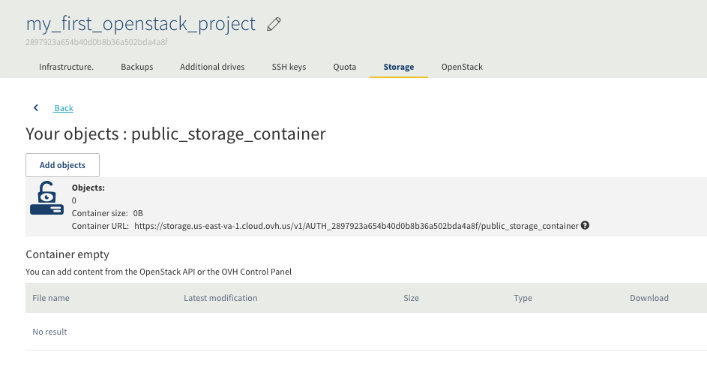
You will next be taken to a view that lists the details of the newly created object container.
3. Install rclone
Rclone is self described as ‘a command line program to sync files and directories to and from cloud storage.’ It is opensource and is compatible with Openstack swift, so it will work with OVH Public Cloud object containers.
The first thing you need to do is download the latest version for your operating system from the rclone download page, unzip the binary and place it within our path.
MacBook-Pro:~ standorsett$ cd ~/Downloads/
MacBook-Pro:Downloads standorsett$ wget https://downloads.rclone.org/v1.42/rclone-v1.42-osx-amd64.zip
--2018-08-14 13:50:18--  https://downloads.rclone.org/v1.42/rclone-v1.42-osx-amd64.zip
Resolving downloads.rclone.org (downloads.rclone.org)... 5.153.250.7
Connecting to downloads.rclone.org (downloads.rclone.org)|5.153.250.7|:443... connected.
HTTP request sent, awaiting response... 200 OK
Length: 9748516 (9.3M) [application/zip]
Saving to: ‘rclone-v1.42-osx-amd64.zip’

rclone-v1.42-osx-amd64.zip                    100%[==============================================================================================>]   9.30M   574KB/s    in 37s

2018-08-14 13:50:56 (255 KB/s) - ‘rclone-v1.42-osx-amd64.zip’ saved [9748516/9748516]

MacBook-Pro:Downloads standorsett$
…unzip the binary,
MacBook-Pro:Downloads standorsett$ unzip rclone-v1.42-osx-amd64.zip
Archive:  rclone-v1.42-osx-amd64.zip
   creating: rclone-v1.42-osx-amd64/
  inflating: rclone-v1.42-osx-amd64/README.html
  inflating: rclone-v1.42-osx-amd64/rclone
  inflating: rclone-v1.42-osx-amd64/rclone.1
  inflating: rclone-v1.42-osx-amd64/README.txt
MacBook-Pro:Downloads standorsett$
…and place it within a folder that is exported in your path.
MacBook-Pro:Downloads standorsett$ sudo cp rclone-v1.42-osx-amd64/rclone /usr/local/bin/
MacBook-Pro:Downloads standorsett$ which rclone
/usr/local/bin/rclone
MacBook-Pro:Downloads standorsett$ rclone --version
rclone v1.42
- os/arch: darwin/amd64
- go version: go1.10.1
MacBook-Pro:Downloads standorsett$
MacBook-Pro:Downloads standorsett$ cd ~/
MacBook-Pro:~ standorsett$
4. Source the openrc.sh file you downloaded in the previous blog post.
The simplest way to use rclone is to source the openrc.sh file you downloaded in the previous blog post. This will set environment variables that the rclone cli will use to connect to the OVH public cloud. When you source the openrc.sh file you will be prompted for the password of the Openstack user listed in this file.
MacBook-Pro:~ standorsett$ source ~/Downloads/openrc.sh
Please enter your OpenStack Password:
MacBook-Pro:~ standorsett$
##5. Export two RCLONE_CONFIG environment variables
As mentioned on the rclone swift documentation you can use rclone with swift without a config file by exporting two environment variables.
MacBook-Pro:~ standorsett$ export RCLONE_CONFIG_MYREMOTE_TYPE=swift
MacBook-Pro:~ standorsett$ export RCLONE_CONFIG_MYREMOTE_ENV_AUTH=true
MacBook-Pro:~ standorsett$
6. Using rclone to list remote object containers.
You can now list all remove object containers by running the command rclone lsd myremote:
MacBook-Pro:~ standorsett$ export RCLONE_CONFIG_MYREMOTE_TYPE=swift
MacBook-Pro:~ standorsett$ export RCLONE_CONFIG_MYREMOTE_ENV_AUTH=true
MacBook-Pro:~ standorsett$ rclone lsd myremote:
2018/08/14 13:23:16 NOTICE: Config file "/Users/standorsett/.config/rclone/rclone.conf" not found - using defaults
           0 2018-08-14 13:23:18         0 public_storage_container
MacBook-Pro:~ standorsett$
If you get tired of seeing the ‘rclone.conf not found’ informational message, you can get rid of it by creating an empty config file with the same name mentioned.
MacBook-Pro:~ standorsett$ touch /Users/standorsett/.config/rclone/rclone.conf
MacBook-Pro:~ standorsett$ rclone lsd myremote:
           0 2018-08-14 13:23:40         0 public_storage_container
MacBook-Pro:~ standorsett$
You can see the command I ran returned the public_storage_container object container I created in step 2.
6. Using rclone to upload files to the object container.
Now that you have confirmed rclone is seeing to the OVH Public Cloud object container you created in step 2, you can upload a file to it. I decided to test with the rclone zip file for OSX that I downlaoded in step 3.
MacBook-Pro:~ standorsett$ rclone copy ~/Downloads/rclone-v1.42-osx-amd64.zip myremote:public_storage_container
MacBook-Pro:~ standorsett$
You can now run rclone ls myremote:[object_container_name] to list the contents of your object container. Here is the output of when I ran that command. I also decided to output the size of the file on the local disk to compare the two. Both the local and remote files contain the same number of bytes.
MacBook-Pro:~ standorsett$ rclone ls myremote:public_storage_container
  9748516 rclone-v1.42-osx-amd64.zip
MacBook-Pro:~ standorsett$ ls -la ~/Downloads/rclone-v1.42-osx-amd64.zip
-rw-r--r--@ 1 standorsett  staff  9748516 Jun 16 12:22 /Users/standorsett/Downloads/rclone-v1.42-osx-amd64.zip
MacBook-Pro:~ standorsett$
The file sizes of the local and remote files matched, but I also wanted to be safe and compare the local MD5 hashsum
MacBook-Pro:~ standorsett$ md5 ~/Downloads/rclone-v1.42-osx-amd64.zip
MD5 (/Users/standorsett/Downloads/rclone-v1.42-osx-amd64.zip) = 6fc9f13129bd890164be65bc11f6c870
MacBook-Pro:~ standorsett$
…to the remote hashsum
MacBook-Pro:~ standorsett$ rclone hashsum MD5 myremote:public_storage_container/rclone-v1.42-osx-amd64.zip
6fc9f13129bd890164be65bc11f6c870  rclone-v1.42-osx-amd64.zip
MacBook-Pro:~ standorsett$
…and verified that the two hashsums matched.
7. Downloading the file from the public object container.
If you created a public object container, all the files contained within the object container can be downloaded without providing any authentication. You should alway consider the purpose of the files being uploaded to the object container when deciding if it should be private or public.
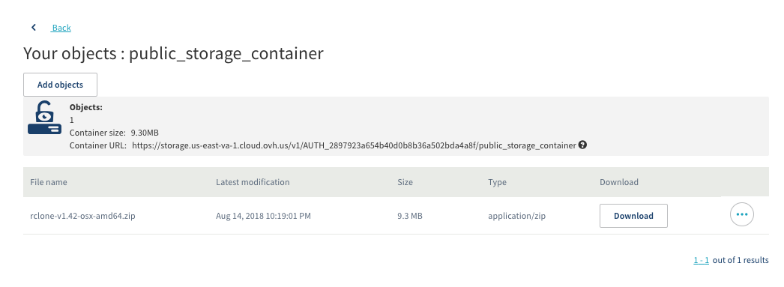
You can test that the files can be access without any authentication. First confirm the file is visible in the ovhcloud.com UI.
You can then paste the Container URL displayed in the object container in a browser and see all the objects contained in it.
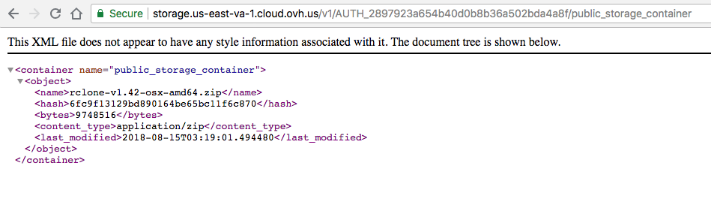
The final test you can do is to add the file name you uploaded to the container URL and test downloading the file.
MacBook-Pro:~ standorsett$ wget https://storage.us-east-va-1.cloud.ovh.us/v1/AUTH_2897923a654b40d0b8b36a502bda4a8f/public_storage_container/rclone-v1.42-osx-amd64.zip
--2018-08-14 22:21:38--  https://storage.us-east-va-1.cloud.ovh.us/v1/AUTH_2897923a654b40d0b8b36a502bda4a8f/public_storage_container/rclone-v1.42-osx-amd64.zip
Resolving storage.us-east-va-1.cloud.ovh.us (storage.us-east-va-1.cloud.ovh.us)... 147.135.3.101
Connecting to storage.us-east-va-1.cloud.ovh.us (storage.us-east-va-1.cloud.ovh.us)|147.135.3.101|:443... connected.
HTTP request sent, awaiting response... 200 OK
Length: 9748516 (9.3M) [application/zip]
Saving to: ‘rclone-v1.42-osx-amd64.zip’

rclone-v1.42-osx-amd64.zip                    100%[==============================================================================================>]   9.30M  2.45MB/s    in 4.3s

2018-08-14 22:21:42 (2.16 MB/s) - ‘rclone-v1.42-osx-amd64.zip’ saved [9748516/9748516]

MacBook-Pro:~ standorsett$
8. Delete the uploaded file with rclone.
Once you are finished with your test files, you should delete them to prevent being charged for their usage. You can delete the files by running the rclone command of rclone deletefile remote:path. Here is the output of when I ran this command and then listed out the files in my object container to verify it had been deleted..
MacBook-Pro:~ standorsett$ rclone deletefile myremote:public_storage_container/rclone-v1.42-osx-amd64.zip
MacBook-Pro:~ standorsett$ rclone ls myremote:public_storage_container
MacBook-Pro:~ standorsett$
###That all for this post covering how to use the rclone utility to manage your OVH public cloud swift storage.
###Please provide any feedback or suggestions to my twitter account located on the about page.