This is the second in a series of posts that will walk you through using the Openstack-based OVH public cloud. In this post you will get introduced to using the Openstack cli to create an Openstack server.
This post is assumes you have already signed up for an account with ovhcloud.com, added a payment method and created a cloud project. If you have not done these steps you can follow the first blog post in this series that will walk you through completing those steps.
I will attempt in this post to present the options that are available to OVH public cloud customers along side the choices I made that were specific to my Openstack server.
Let’s get started…
1. Sign into ovhcloud.com.
The first thing you will need to do before you can move forward with this post is sign into https://ovhcloud.com/auth/ using the account you created in the first blog post..

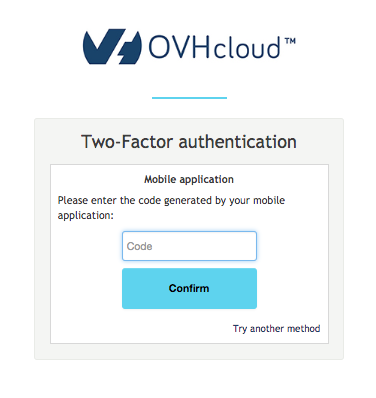
If you setup two-factor authentication, you will be prompted to enter the current two-factor token.
2. Create a new user account to use with the Openstack API.
The Openstack API will not use the credentials you used to log into the ovhcloud.com site, but will instead use an Openstack user to create, modify or view objects in an OVH cloud project.
If have not created one already, you will need to create an Openstack user account within the cloud project you want to work with. You can display all the Openstack user accounts that have been created in a cloud project by clicking the ‘Openstack’ tab within any cloud project.

Create a new user by clicking the “Add user” button.
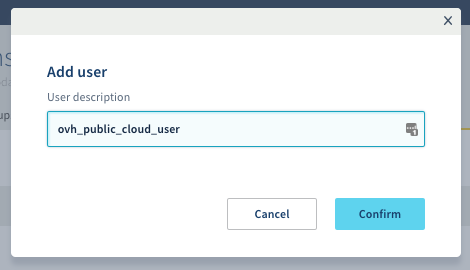
Once you have specified the username and clicked “Confirm” you will be taken back to the Openstack tab. You will see the user you created and will also be able to see the password generated for this user for a short period of time. Make sure you record this password to a safe place since it will not be visible for very long.

After a period of time you will no longer be able to see the password for the user you created, but If you do happen to forget the password, you can always have a new password regenerated.

3. Download an Openstack configuration file.
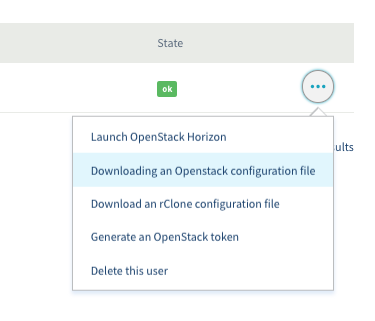
Now that you have an Openstack user created you can download an openrc.sh file that will contain all the details need by the Openstack cli to connect as this user. Click the ‘…’ icon and the end of the line for the user you want to download a configuration file for and select ‘Downloading an Openstack configuration file’.
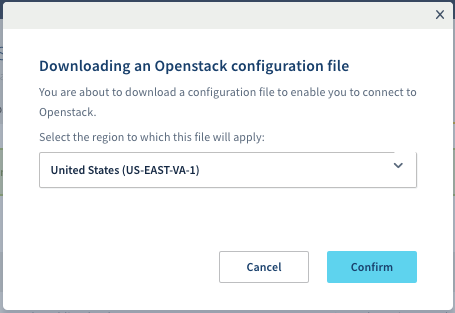
Select the region (datacenter) you want to connect to and click ‘confirm’. Your browser will next prompt you where you want to save the downloaded openrc.sh file.
If you look at the downloaded file you will see that it sets environment variables containing the Openstack details needed to connect to your cloud project.
MacBook-Pro:Desktop standorsett$ cat ~/Downloads/openrc.sh
#!/bin/bash

# To use an Openstack cloud you need to authenticate against keystone, which
# returns a **Token** and **Service Catalog**. The catalog contains the
# endpoint for all services the user/tenant has access to - including nova,
# glance, keystone, swift.
#
export OS_AUTH_URL=https://auth.cloud.ovh.us/v3/
export OS_IDENTITY_API_VERSION=3

export OS_USER_DOMAIN_NAME=${OS_USER_DOMAIN_NAME:-"Default"}
export OS_PROJECT_DOMAIN_NAME=${OS_PROJECT_DOMAIN_NAME:-"Default"}


# With the addition of Keystone we have standardized on the term **tenant**
# as the entity that owns the resources.
export OS_TENANT_ID=2897923a654b40d0b8b36a502bda4a8f
export OS_TENANT_NAME="3543682553721111"

# In addition to the owning entity (tenant), openstack stores the entity
# performing the action as the **user**.
export OS_USERNAME="5r7jJyuwwwsv"

# With Keystone you pass the keystone password.
echo "Please enter your OpenStack Password: "
read -sr OS_PASSWORD_INPUT
export OS_PASSWORD=$OS_PASSWORD_INPUT

# If your configuration has multiple regions, we set that information here.
# OS_REGION_NAME is optional and only valid in certain environments.
export OS_REGION_NAME="US-EAST-VA-1"
# Do not leave a blank variable, unset it if it was empty
if [ -z "$OS_REGION_NAME" ]; then unset OS_REGION_NAME; fi
MacBook-Pro:Desktop standorsett$
The only piece of information that this file does not contain is your password, which it will prompt for when you source this file.
4. Log into the Openstack Horizon UI.
Just like you needed to create an Openstack user for interacting with the Openstack API, you will need to create a ssh keypair used for connecting to Openstack servers. This can be done within the Openstack Horizon UI.
Click the ... icon and the end of the line for the user you want to use for interacting with the Openstack API and select Launch Openstack Horizon.
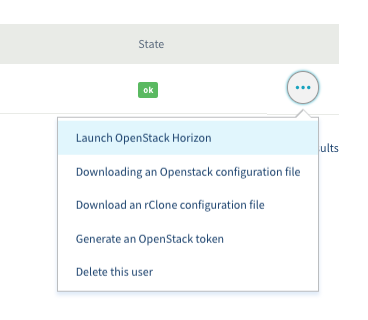
This will open another browser tab for the Openstack Horizon UI with your username already filled in. Provide the password for this user and click connect.

5. Create a ssh key-pair in the Openstack Horizon UI.
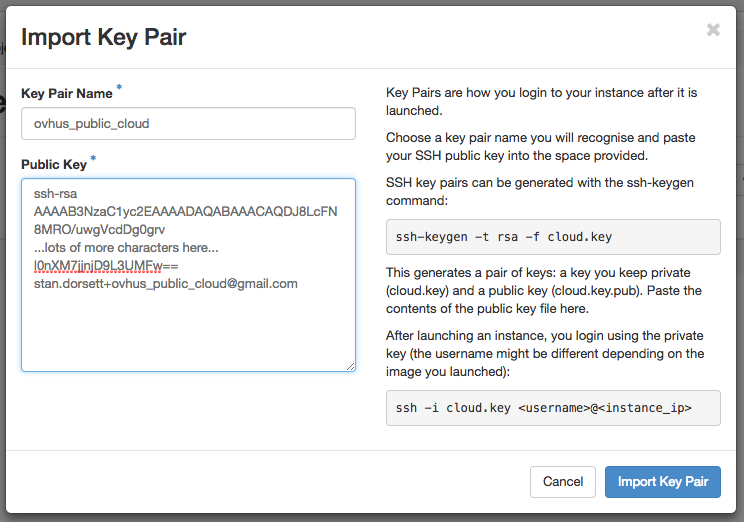
We need to add a new ssh keypair that the Openstack API can add to servers that are created through the API. To keep things simple I added the same public ssh key that I generated in the first blog post.
To add a new ssh key pair go to Project | Compute | Key pairs | Create Key Pair
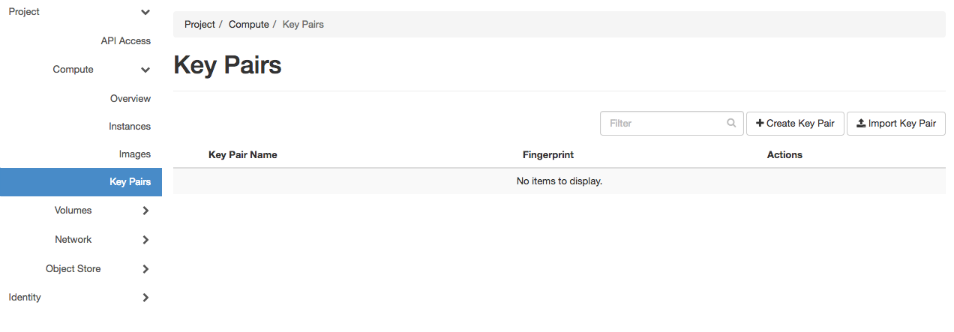
Give the key pair a friendly name you can remember and paste the contents of the public key file. Click Import Key Pair to add this key pair.
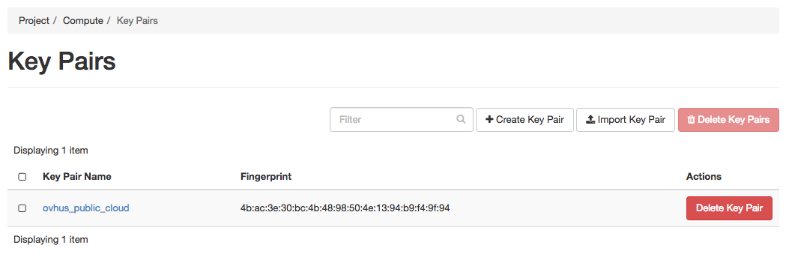
The key pair you just added will now be visible in the Horizon UI.
6. Installing the Openstack cli.
You will need to install the openstack cli on the operating system you are using. You can easily find instruction for installing it on whatever OS you prefer to use. I quickly installed it on my Mac laptop with homebrew using the following commands.
brew install python2
pip2 install --upgrade pip setuptools
pip2 install --upgrade python-openstackclient
7. Sourcing the openrc.sh file
The first step to using the Openstack cli you just installed is to source the openrc.sh file you downloaded in step 3. This will set environment variables that the Openstack cli will use to connect to the OVH public cloud. When you source the openrc.sh file you will be prompted for the password of the Openstack user listed in this file.
MacBook-Pro:~ standorsett$ source ~/Downloads/openrc.sh
Please enter your OpenStack Password:
MacBook-Pro:~ standorsett$
If you take a look at your exported environmental variables after sourcing the openrc.sh file, you will see the values from the opensh.rc file set along with your password.
MacBook-Pro:~ standorsett$ export | grep OS_
declare -x OS_AUTH_URL="https://auth.cloud.ovh.us/v3/"
declare -x OS_IDENTITY_API_VERSION="3"
declare -x OS_PASSWORD="*******************************"
declare -x OS_PROJECT_DOMAIN_NAME="Default"
declare -x OS_REGION_NAME="US-EAST-VA-1"
declare -x OS_TENANT_ID="2897923a654b40d0b8b36a502bda4a8f"
declare -x OS_TENANT_NAME="3543682553721111"
declare -x OS_USERNAME="5r7jJyuwwwsv"
declare -x OS_USER_DOMAIN_NAME="Default"
MacBook-Pro:~ standorsett$
8. Using the Openstack cli to create an Openstack server
Now that you have sourced the openrc.sh file you can create an Openstack server using the Openstack cli.
The four pieces of information you will need to create a new server are:
- The ssh key pair name that will be allowed to connect.
- The operating system (image) you want to use.
- The size of the server (flavor) you want to use.
- The security group you want to have applied to the server.
First list the ssh key pairs so you can see the key pair you created in step 5 by running openstack keypair list. You will need the name of this keypair shortly.

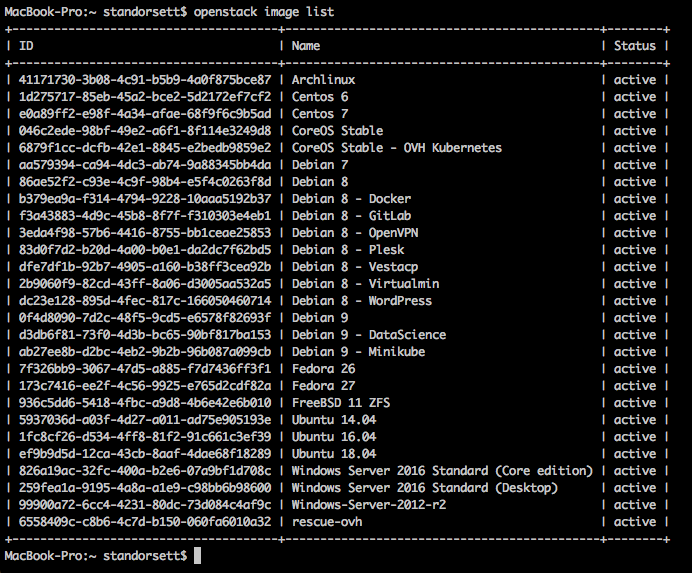
Next list the available operating system images by running openstack image list. You will need the ID of the image you want to use
I noted e0a89ff2-e98f-4a34-afae-68f9f6c9b5ad for the ID of the Centos 7 image I wanted to use in my test.
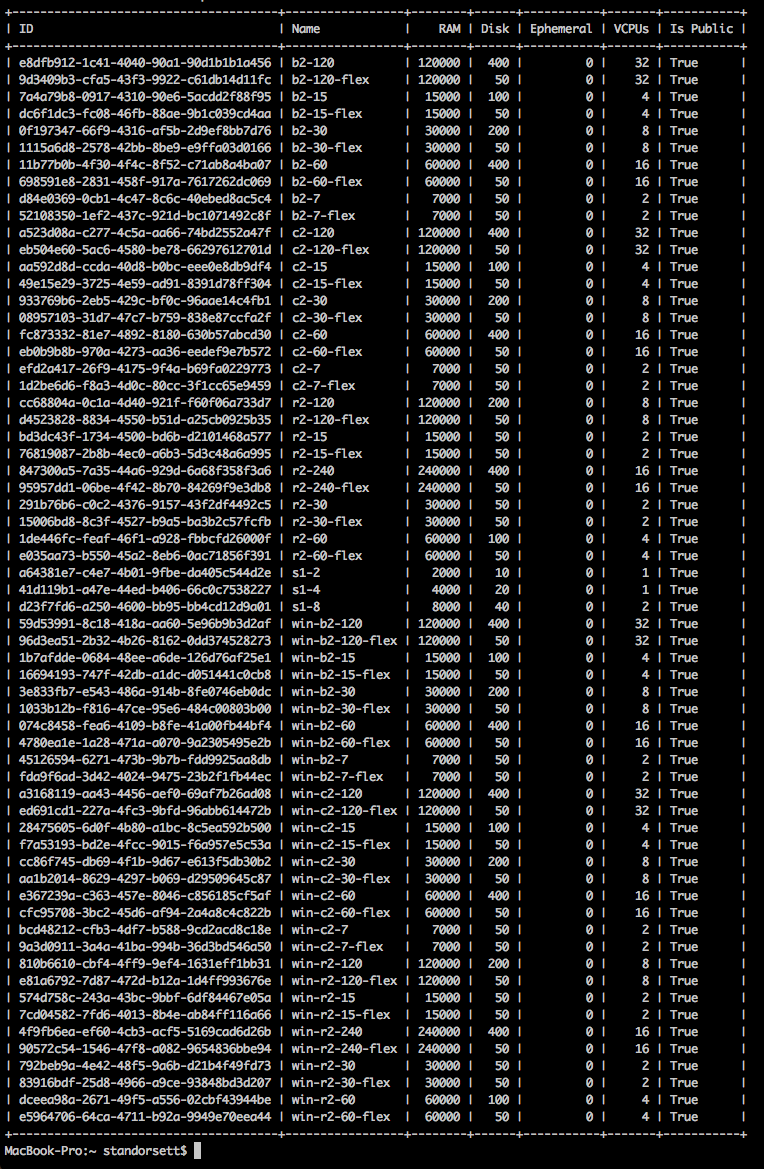
Next list the available server sizes or flavors by running openstack flavor list. You will need the ID of the flavor of the server you want to create. I wanted to use a s1-2 flavor image since it was the smallest sandbox server with the lowest hourly rate, so I noted it’s ID was a64381e7-c4e7-4b01-9fbe-da405c544d2e
Finally list the security groups by running openstack security group list. The default security group which allows all inbound and outbound traffic is named default. I decided to use this default security group for my test rather than create a new one that was more restrictive.
 The default security group is named
 default so you will need to specify it when creating a server..
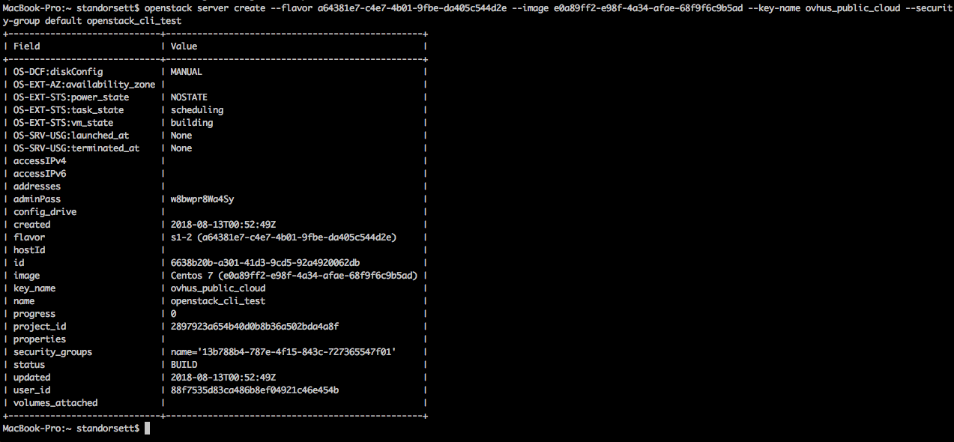
Now knowing the flavor id, image id, keypair name and security group name you are ready to create a new openstack server using a command like the following
openstack server create --flavor a64381e7-c4e7-4b01-9fbe-da405c544d2e --image e0a89ff2-e98f-4a34-afae-68f9f6c9b5ad --key-name ovhus_public_cloud --security-group default openstack_cli_test
Below is a screenshot of me running that command.
After the Openstack server has been created you can run openstack server list to show the details of the server you just created. The networks field will show the IP address of the server.

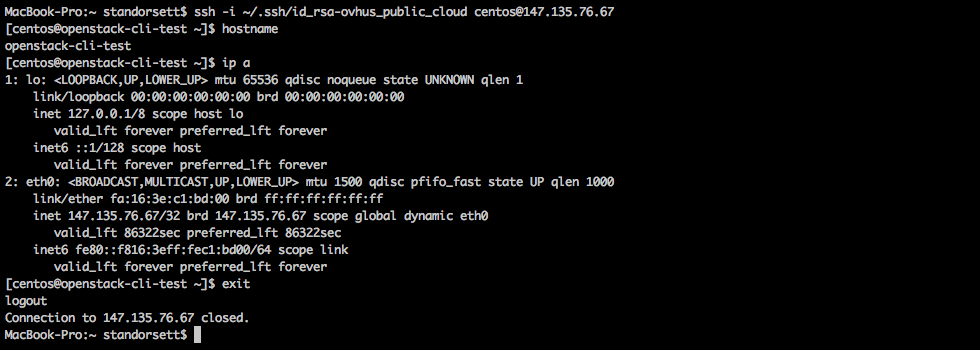
Now that you know the IP address of the server you just created, You can test connecting to this server using the ssh key you created in the previous blog post.
9. Validating the Openstack server in ovhcloud.com UI
You can check the ovhcloud.com UI to confirm the server has been created and the IP address is the same as what openstack server list displayed.

10. Deleting the Openstack server using the Openstack cli.
Once you are finished with your openstack server, you should delete the server to prevent being charged for it’s usage. Run the following command in the Openstack cli to delete the server.

Running openstack server list will show that the server has been sucessfully deleted.

You can also check the ovhcloud.com UI to confirm the server has been deleted.

###That all for this post covering how to use the Openstack cli utility to create servers on the OVH public cloud.
###Please provide any feedback or suggestions to my twitter account located on the about page.