This post will pick up where we left off by demonstrating more vagrant-vsphere provider settings using the CentOS template we customized in the last blog post. Let’s get started:
1. Create a new customization specification in the vSphere web client. This customization specification will allow us to set the hostname of the vm created by “vagrant up” to the same name as the virtual machine.
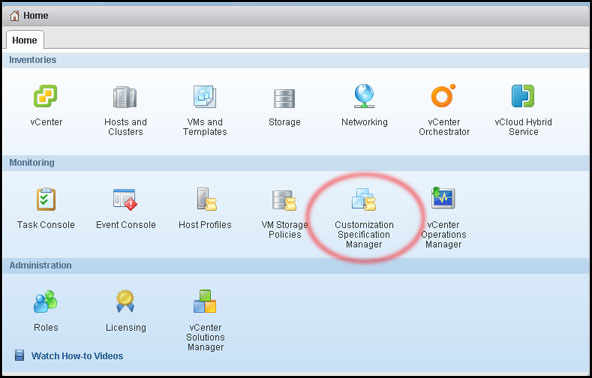
- Go to Home | Customization Specification Manager:
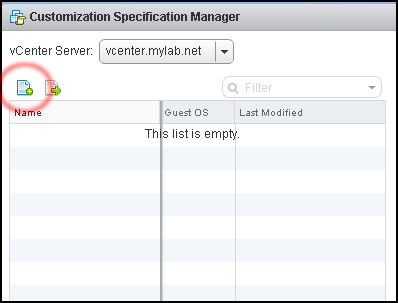
- Click the “Create a new specification” button:
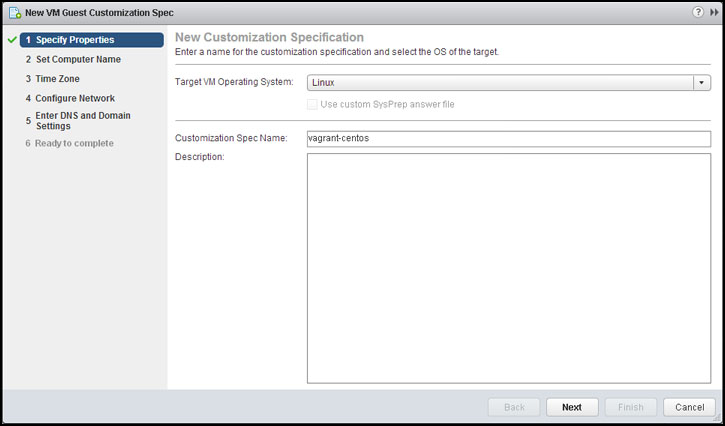
- Select “Linux” for the “Target VM Operating System” and name the customization specification. Click “Next” to continue
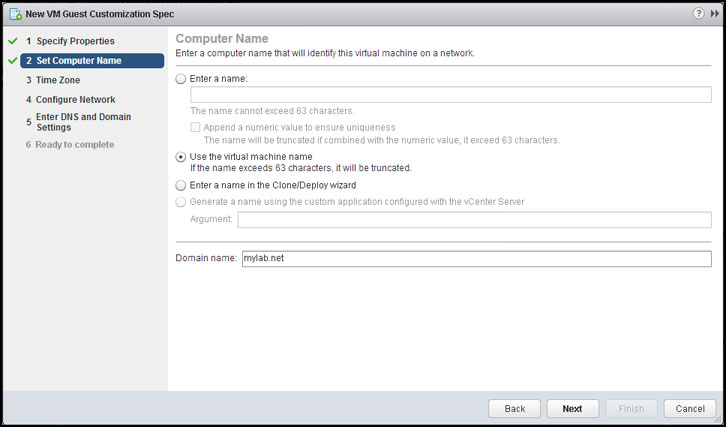
- For “Computer Name” select “Use the virtual machine name” and click “Next” to continue.
- For “Time Zone” select the time zone you want to use and click “Next” to continue.
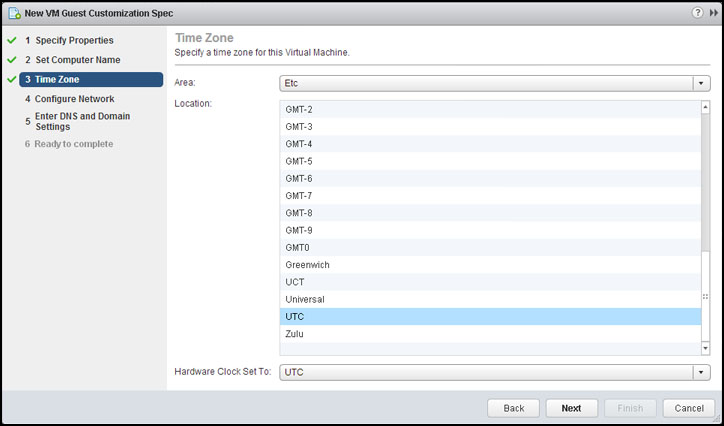
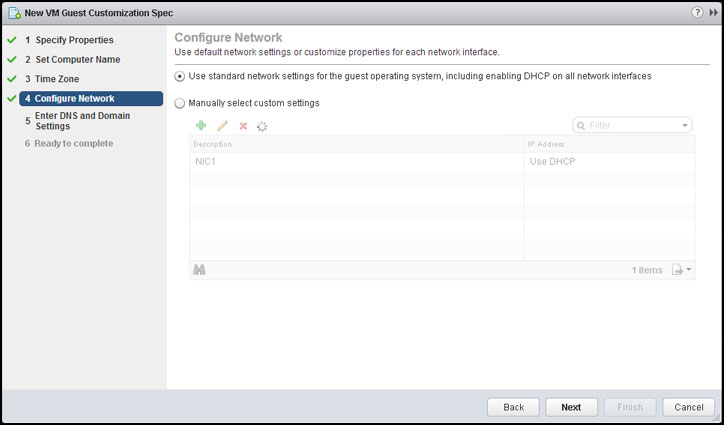
- For “Configure Network” keep the default and click “Next to continue.
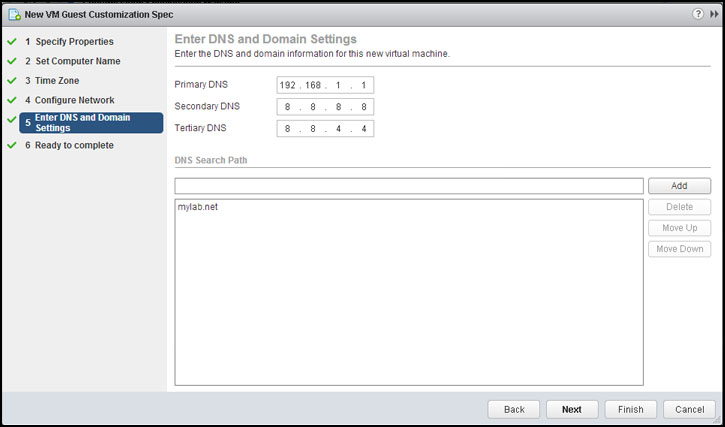
- For “Enter DNS and Domain settings” enter the DNS servers and the domain name you want to assign to the cloned vm. Click “Next to continue.
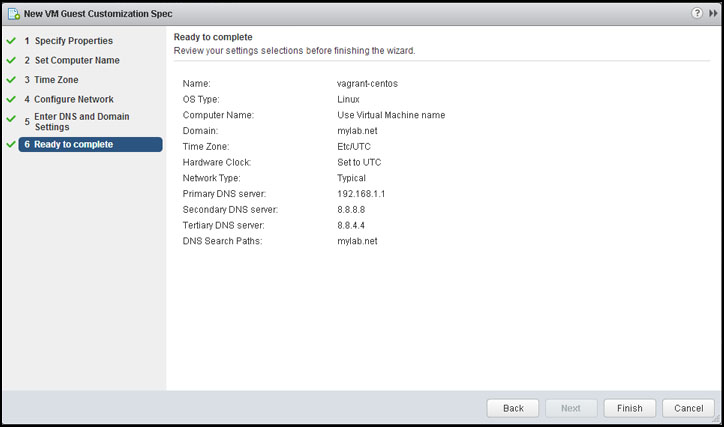
- Click “Finish” to create the customization specification.
2. Modify the Vagrantfile we created in the initial Installing Vagrant and the vagrant-vsphere plugin on CentOS 6.x post.
[root@vagrant vagrant-vms]# cat Vagrantfile
Vagrant.configure("2") do |config|
  config.vm.box = 'dummy'
  config.vm.box_url = './example_box/dummy.box'

  config.vm.provider :vsphere do |vsphere|
    vsphere.host = '192.168.1.195'
    vsphere.name = 'vagrant-test'
    vsphere.clone_from_vm = true
    vsphere.template_name = 'vagrant-centos-6.5'
    vsphere.user = 'root@localos'
    vsphere.password = 'S0meR@nd0mP@ssw0rd'
    vsphere.insecure = true
    vsphere.data_store_name = 'vsanDatastore'
    vsphere.linked_clone = true
    vsphere.customization_spec_name = 'vagrant-centos'
  end
end
The following new lines have been added:
- “vsphere.data_store_name” is the datastore that the cloned vm will be deployed to.
- “vsphere.linked_clone” being set to “true” will cause the cloned vm to be deployed as a linked clone. This will dramatically decrease the amount of time needed to clone the vm when “vagrant up” command is issued.
- “vsphere.customization_spec_name” will specify the customization specification that will be applied to the cloned vm. Set this to the customization specification we created in the previous step.
3. Test the configuration changes we made by running a “vagrant up”:
[root@vagrant vagrant-vms]# vagrant up --provider=vsphere
Bringing machine 'default' up with 'vsphere' provider...
==> default: Calling vSphere CloneVM with the following settings:
==> default:  -- Source VM: vagrant-centos-6.5
==> default:  -- Name: vagrant-test
==> default: Waiting for SSH to become available...
==> default: New virtual machine successfully cloned and started
==> default: Rsyncing folder: /root/vagrant-vms/ => /vagrant
[root@vagrant vagrant-vms]#
You should find the time it took to deploy the linked clone vm was much faster than previous full clones of the vagrant template vm.
4. Connect to the vagrant vm to validate the hostname of the vm matched the vm name & search domain:
[root@vagrant vagrant-vms]# vagrant ssh
[vagrant@vagrant-test ~]$ hostname -f
vagrant-test.mylab.net
[vagrant@vagrant-test ~]$ exit
logout
Connection to 192.168.1.117 closed.
[root@vagrant vagrant-vms]#
5. Clean up after ourselves and call it a day:
[root@vagrant vagrant-vms]# vagrant destroy
==> default: Calling vSphere PowerOff
==> default: Calling vShpere Destroy
[root@vagrant vagrant-vms]#
You might be wondering why setting the hostname & domain name might be so important. We will see in future posts how to use hostnames to determine which manifests will be applied to specific vms we clone and power up with Vagrant.